In 2025, building your own desktop is more exciting and accessible than ever. With advancements in technology and a wide array of options for customization, DIY desktop assembly has become the go-to choice for enthusiasts seeking performance, personalization, and cost-efficiency. Whether you’re a gamer, content creator, or casual user, this custom PC-building guide will walk you through everything you need to know about creating your perfect machine.
In 2025, the allure of building a DIY desktop lies in its endless possibilities. From handpicking components to customizing aesthetics, DIY PC assembly lets you create a machine tailored specifically to your needs. Compared to prebuilt systems, a custom desktop often offers better performance, greater flexibility, and a sense of accomplishment. This guide will help you navigate the process, from selecting components to troubleshooting, ensuring a smooth and rewarding experience.
Why Build Your PC?
Building your own desktop in 2025 offers several advantages:
- Customization: Select components based on your specific needs, such as gaming, content creation, or everyday use.
- Performance: Achieve optimal performance by choosing high-quality parts and eliminating unnecessary bloatware.
- Cost Efficiency: Save money by assembling your PC, avoiding labour costs, and focusing your budget on essential components.
- Upgradability: DIY desktops are easier to upgrade, ensuring compatibility with future technologies.
- Learning Experience: Building your PC is an educational process that enhances your understanding of computer hardware.
Essential Components for a DIY Desktop
To build your PC, you’ll need the following components:
| Component | Purpose | Examples (2025) |
|---|---|---|
| CPU | The brain of the computer, responsible for processing tasks | Intel Core i7-14700K, AMD Ryzen 7800X |
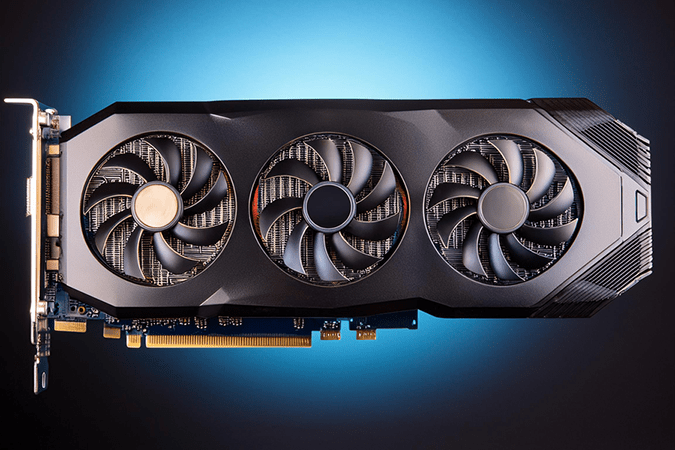
| GPU | Handles graphics rendering, crucial for gaming and video editing | NVIDIA RTX 5090, AMD Radeon RX 7800 XT |
| Motherboard | Connects all components and provides power delivery | ASUS ROG Strix Z890, MSI MPG B760 TOMAHAWK |
| RAM | Provides temporary data storage for active applications | Corsair Vengeance DDR5 32GB (5200 MHz) |
| Storage | Permanent storage for the operating system and files | Samsung 990 Pro NVMe SSD, Seagate Barracuda 4TB HDD |
| Power Supply | Supplies power to all components, ensuring stable operation | Corsair RM850x 850W (80+ Gold) |
| Case | Encloses all components, provides cooling and aesthetic appeal | NZXT H9 Elite, Lian Li O11 Dynamic EVO |
| Cooling System | Keeps the CPU and GPU temperatures under control | Noctua NH-D15 (air), NZXT Kraken X73 (liquid) |

Understanding Compatibility
Ensuring compatibility between components is critical to a smooth build. Key factors to consider include:
- Socket Type: The CPU and motherboard must share the same socket type (e.g., AM5 for AMD or LGA1700 for Intel).
- Power Supply: Calculate the wattage required for your components using an online PSU calculator.
- Physical Fit: Ensure your case supports the size of your motherboard (e.g., ATX, Micro-ATX) and GPU length.
- Memory Compatibility: Confirm that your RAM matches your motherboard’s specifications (DDR4 vs. DDR5).
Step-by-Step Guide to Building a PC
1. Gather Your Tools
- Phillips-head screwdriver
- Anti-static wrist strap
- Cable ties for organization
2. Assemble the Components
- Install the CPU on the motherboard.
- Attach the CPU cooler (air or liquid).
- Install RAM in the appropriate DIMM slots.
- Secure the motherboard into the case.
- Connect the power supply and route cables.
- Install the GPU and storage drives.
3. First Boot Setup
- Double-check all connections.
- Power on the system and enter the BIOS to configure initial settings.
- Install the operating system (e.g., Windows 11, Linux).
Choosing the Right Case
Your case affects airflow, cooling, and aesthetics. Consider:
- Size: Full-tower cases for high-end builds; mid-tower for general use.
- Cooling Options: Ensure sufficient space for fans or liquid cooling radiators.
- Cable Management: Look for cases with ample room for cable routing.
Cooling Systems: Air vs. Liquid
Cooling is essential for maintaining performance and longevity:
- Air Cooling: Reliable and cost-effective, ideal for most users.
- Liquid Cooling: Superior for overclocked systems or high-performance builds.
Budgeting for Your Custom Desktop
Budget Breakdown for DIY Desktop 2025
| Use Case | Estimated Budget | Recommended Components |
|---|---|---|
| Basic Office Work | $600–$800 | Intel Core i3, 16GB DDR5, Integrated Graphics |
| Gaming PC | $1,200–$1,800 | AMD Ryzen 7700X, NVIDIA RTX 4070, 1TB SSD |
| Content Creation | $2,000+ | Intel Core i9, NVIDIA RTX 5090, 32GB DDR5, Liquid Cooling |
DIY Desktop for Gaming in 2025
Building a gaming rig involves:
- High Refresh Rate Monitors: Pair with GPUs that support 4K or 144Hz gaming.
- Optimized Storage: Use NVMe SSDs for faster load times.
- RGB Customization: Add LED lighting for aesthetics.

Building for Content Creation
Creative professionals need systems optimized for rendering, editing, and multitasking. Key components:
- High-Core CPUs: Faster rendering times with multi-threaded performance.
- Large RAM Capacity: At least 32GB for heavy workloads.
Troubleshooting and Common Issues
- No Power: Recheck power connections and ensure the PSU is switched on.
- No Display: Verify GPU and monitor connections.
- Overheating: Ensure proper airflow or adjust cooling system settings.
Upgradability and Future-Proofing
- Choose a motherboard with extra RAM slots and PCIe lanes.
- Invest in a power supply with headroom for future upgrades.
- Opt for cases with modular designs for easy expansion.
Conclusion
Building a DIY desktop in 2025 offers unparalleled opportunities for customization, performance, and learning. With this guide, you’re equipped to build a PC that meets your needs and stands the test of time. Whether you’re gaming, working, or creating, the satisfaction of building your own machine is unmatched


